Thermal Imaging Inspections in Melbourne Following Hurricane Damage: A Step-by-Step Explanation
When a hurricane moves through Melbourne, the visible damage is usually what gets everyone’s attention first—missing shingles, downed branches, torn screens, and fence sections twisted out of place. But for many homeowners, the bigger threat shows up days or even weeks later, when indoor air starts to feel damp, a faint musty odor appears, or a ceiling stain slowly spreads.
That delayed damage is usually moisture—hidden moisture.
Hurricanes bring wind-driven rain, pressure changes, power outages, and long periods of elevated humidity. Even if you don’t see standing water inside, storm moisture can still work its way into attic insulation, wall cavities, flooring systems, and HVAC components. In Florida’s climate, that hidden moisture can quickly lead to mold growth, material swelling, and long-term structural deterioration.
Thermal imaging inspections are one of the most practical ways to locate that hidden moisture early—without tearing the home apart. Below is a step-by-step breakdown of how thermal imaging inspections are typically approached in Melbourne following hurricane damage, what they uncover, and what most property owners should do next.
Why Thermal Imaging Matters After Hurricanes in Melbourne
Melbourne sits on Florida’s east coast, where hurricanes and tropical systems often bring rain that hits sideways. Roof systems, soffits, windows, and exterior penetrations can take a beating. On top of that, coastal humidity stays high long after the storm passes, which slows natural drying and makes moisture harder to spot.
Thermal imaging becomes important after a hurricane because it can:
-
Identify hidden moisture before visible damage appears
-
Trace leak pathways that don’t match the stain location
-
Help determine how far moisture spread
-
Reduce guesswork (and unnecessary demolition)
-
Support faster, more targeted drying and repairs
This is especially helpful in Melbourne neighborhoods near the coast, river-influenced zones, or areas with older construction where seals, flashing, and roof penetrations may already be stressed.
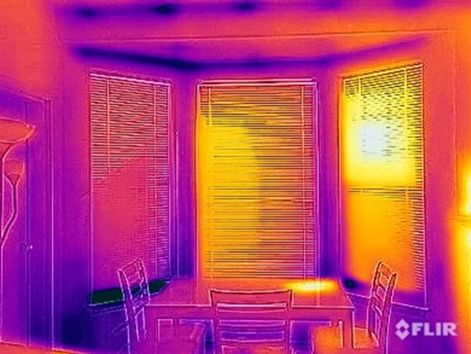
What Thermal Imaging Shows (In Simple Terms)
A thermal imaging camera reads surface temperatures. It does not “see water.” What it detects are temperature differences that often occur when moisture is present.
Why moisture often shows up cooler:
-
Damp materials evaporate moisture, which cools the surface (evaporative cooling).
-
Wet insulation or drywall can create cooler patterns than surrounding dry areas.
Thermal imaging is a strong screening tool—and the best inspections don’t stop there. Any suspicious thermal pattern should be confirmed with moisture meters and, when needed, limited access points.
Step 1: Start With a Hurricane-Specific Visual Walkthrough
A professional inspection usually begins with a calm, methodical walkthrough—because hurricane moisture doesn’t behave like a typical plumbing leak.
This step focuses on:
-
Roof line transitions, valleys, and edge areas
-
Roof penetrations (vents, pipe boots, exhausts)
-
Soffits, gable vents, and ridge vents
-
Window/door frames and sliding door tracks
-
Garage door corners and weather seals
-
Ceiling corners and skylight shafts (if present)
In Melbourne, wind-driven rain often finds weaknesses around vent stacks and flashing points. And when the home loses power, AC shutdown can cause humidity to spike and condensation to form in places that were previously stable.
Step 2: Create Conditions That Improve Scan Accuracy
Thermal imaging works best when there’s a temperature difference between indoors and outdoors.
After a hurricane, professionals often:
-
Keep the home closed and conditioned (if power is available)
-
Allow the HVAC to run for a while before scanning
-
Avoid scanning immediately after opening doors/windows repeatedly
If the home has no power, inspections can still be useful—especially for areas that are actively damp—but results may require extra confirmation with moisture meters because temperature contrast can be weaker.
Step 3: Scan the Highest-Risk Areas First
In Melbourne following hurricane damage, the first scanning priorities usually include:
Ceilings and Upper Walls
-
Leak pathways often travel across roof decking before appearing as stains.
-
Moisture may spread laterally through attic insulation.
Around Windows and Exterior Doors
-
Wind-driven rain can enter through failed caulking or gaps.
-
Sliding door tracks can hold water and feed moisture into the frame.
Exterior-Facing Walls
-
Hurricane winds push moisture into tiny openings.
-
Insulation inside walls can hold dampness longer than expected.
Garage-to-Home Shared Walls
-
Garages often take on moisture and heat differently.
-
Pressure changes during storms can push humid air inward.
This is where thermal imaging helps prioritize what to test next—rather than chasing the most obvious stain and missing the real source.
Step 4: Interpret Patterns the Right Way (Not Every Cool Spot Is a Leak)
A skilled inspector looks for patterns that “behave like moisture,” such as:
-
Irregular shapes that follow framing paths
-
Vertical streaks suggesting gravity movement
-
Clusters near penetrations or corners
-
Cool halos around windows/doors
They also know what can create false readings:
-
Air leaks from HVAC ducts near ceilings
-
Differences in insulation thickness
-
Shadows or sun-heated exterior walls cooling unevenly
-
Cold supply lines in walls (plumbing lines can mimic moisture patterns)
That’s why thermal imaging should be paired with moisture confirmation tools.
Step 5: Confirm Findings With Moisture Meters
After the camera highlights suspicious areas, moisture meters are used to verify.
Common confirmation steps:
-
Pin-type moisture meter readings for wood framing (when accessible)
-
Non-invasive meter readings for drywall surfaces
-
Multiple readings across the suspected zone to map the boundary
This matters because post-hurricane moisture often spreads beyond what the eye can see. Confirming moisture levels helps define the real footprint—what needs drying, what needs removal, and what can stay intact.
Step 6: Map Moisture Spread (Because “One Leak” Is Often Many Wet Areas)
Following a hurricane, a single intrusion point can produce multiple damp zones. For example:
-
Water enters at a lifted shingle line near a roof ridge
-
Runs along decking
-
Saturates insulation in multiple bays
-
Reaches a ceiling seam far away from the entry point
A proper moisture map documents:
-
The center of the wettest area
-
The direction moisture traveled
-
Adjacent areas at risk (especially insulation pockets)
-
Where drying equipment should be placed
This step helps avoid “patch fixes” that miss damp materials behind the scenes.
Step 7: Evaluate Attics and HVAC Systems Carefully
In Melbourne homes, attics often hold:
-
Ductwork
-
Air handlers
-
Blown-in insulation
-
Roof decking and trusses
After hurricane conditions, attic concerns can include:
-
Wet insulation that stays damp for days
-
Duct sweating when AC restarts in a humid attic
-
Water intrusion through vents (especially if wind damage shifted vent covers)
Thermal imaging in the attic can reveal cool patches on roof decking or odd temperature zones around ductwork. But the bigger goal is deciding what needs:
-
Removal (saturated insulation)
-
Drying (framing/decking)
-
Repair (duct insulation or venting)
Step 8: Decide Whether Drying Can Be Targeted or Materials Must Be Opened
Once moisture is confirmed, professionals determine the least disruptive effective plan.
Typical decisions include:
-
Targeted structural drying if moisture is limited and materials can dry safely
-
Selective drywall removal when moisture is trapped in a wall cavity
-
Insulation removal when insulation is saturated (because insulation often becomes a moisture reservoir)
-
Air circulation and dehumidification to stabilize humidity and prevent secondary condensation
This is where good inspection work saves money: the better the map, the more precise the drying plan.
Step 9: Re-Scan and Re-Test After Drying Starts
A common homeowner mistake after storms is assuming that once equipment is running, the problem is “handled.” In reality, drying needs verification.
Professionals often re-check:
-
Moisture levels in the original wettest points
-
Surrounding areas that might still be holding moisture
-
Humidity levels (because high indoor humidity can stall drying)
Thermal imaging can also help spot stubborn damp zones that don’t respond as expected—often because moisture is trapped behind an unventilated cavity or beneath a material layer.
Step 10: Document Results for Repairs, Claims, and Peace of Mind
After hurricane damage, documentation matters—especially for contractors, landlords, or property managers.
A thorough report may include:
-
Thermal images showing anomaly locations
-
Moisture meter readings (initial and follow-up)
-
Notes on probable moisture pathways
-
Recommendations for drying focus areas
-
Guidance on when it’s safe to rebuild (close walls, reinstall insulation, refinish surfaces)
Inspections and More FL typically approaches hurricane-related moisture inspections with this kind of documentation mindset, because coastal Florida homes can look “fine” and still hold moisture in places that lead to bigger costs later.
What Most Melbourne Homeowners Overlook After a Hurricane
Even careful homeowners miss these common post-storm realities:
Moisture Can Enter Without a “Leak”
Wind-driven rain can enter through gaps that don’t drip like a faucet. It can damp insulation and framing with no obvious water trail.
Odors Often Come Later
Musty smells might show up after humidity rises and materials begin off-gassing dampness—not immediately after the storm.
Dry-Looking Surfaces Can Hide Wet Cavities
Drywall can feel normal while insulation behind it stays damp. That’s why thermal imaging + meters matter.
AC Restart Can Create Condensation Problems
Once power returns, cold ducts running in a wet attic can create new moisture issues—separate from the original storm intrusion.
Why Local Florida Experience Makes a Difference
Thermal imaging is a tool, but interpretation depends on local knowledge.
A Florida-experienced inspector understands:
-
How Melbourne’s coastal humidity affects drying timelines
-
How slab-on-grade construction changes moisture behavior
-
How hurricanes push moisture into roofs, vents, and wall systems
-
What’s common in nearby communities like Palm Bay, Cocoa, Merritt Island, and Sanford—so patterns aren’t misread or dismissed
That local familiarity often leads to faster, more accurate diagnosis and fewer “repeat moisture surprises.”
Calm, Practical Next Steps After Hurricane Damage
If your home in Melbourne has experienced hurricane conditions—especially if you notice damp indoor air, odors, staining, or unexplained humidity—don’t rely on guesswork.
A reasonable plan looks like this:
-
Confirm roof/exterior integrity
-
Schedule moisture detection (thermal imaging + meter confirmation)
-
Start targeted drying quickly if moisture is found
-
Re-test before rebuilding or sealing cavities
-
Improve prevention (venting, sealing, humidity control) before the next storm season
This approach protects the structure, shortens recovery time, and reduces the chance of mold problems later.