How Mold Removal Protects Properties in Merritt Island After Roof Failures
Roof failures in Merritt Island rarely stay limited to missing shingles or visible ceiling stains. In Florida’s coastal climate, when a roof system is compromised — whether from storm damage, aging materials, or salt air corrosion — water intrusion often spreads quietly into attic spaces, wall cavities, and insulation layers. By the time the leak becomes obvious, moisture may already be affecting structural components.
Because Merritt Island sits in a high-humidity, storm-prone environment, roof failures frequently lead to mold growth if not addressed quickly and properly. Mold removal, when performed correctly, protects not only the appearance of the home but also its structural stability, indoor air quality, and long-term value.
Let’s take a closer look at how roof failures create hidden risks in Merritt Island homes — and how professional mold removal helps protect the property from escalating damage.
Why Roof Failures Are So Common in Merritt Island
Living near the coast brings unique environmental stress to roofing systems.
Homes in Merritt Island face:
- Salt air corrosion weakening flashing and fasteners
- Heavy summer storms and tropical systems
- Wind-driven rain entering under shingles
- High UV exposure
- Persistent humidity
- Rapid temperature swings in attic spaces
Even small roofing vulnerabilities — such as lifted shingles or minor flashing separation — can allow water to enter during storms. Once inside, water rarely drips straight down. It travels along rafters and roof decking before settling into insulation and wall cavities.
In many cases, the leak that homeowners see is not directly beneath the original entry point.
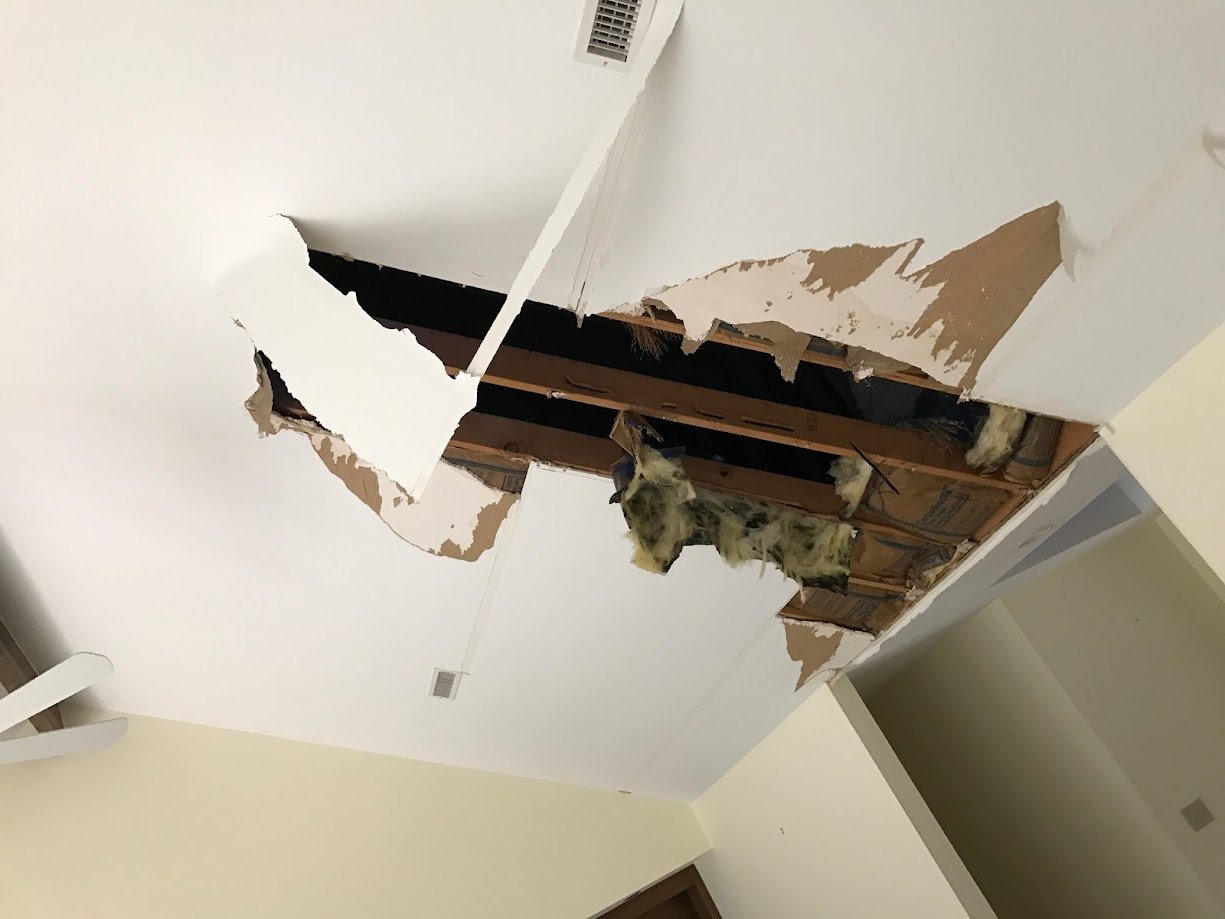
What Happens After a Roof Failure
When moisture enters through a damaged roof, several processes begin immediately:
- Attic insulation absorbs water
- Roof decking increases in moisture content
- Wooden trusses retain dampness
- Ceiling drywall softens
- Indoor humidity levels rise
In Merritt Island’s warm climate, microbial growth can begin within 24–48 hours on damp materials.
Even if the roof is repaired quickly, trapped moisture may remain inside attic systems. Without proper drying and mold removal, contamination can continue spreading.
Early Warning Signs of Mold After Roof Damage
After roof failures, homeowners may notice:
- Musty odors
- Ceiling discoloration
- Bubbling paint
- Warped drywall
- Increased allergy-like symptoms indoors
- Dark staining on attic decking
- Compressed or damp insulation
Some signs appear weeks after the initial leak. That delay often causes homeowners to underestimate the scope of the problem.
Why Mold Removal Is Necessary — Not Optional
Surface cleaning alone is not sufficient after roof-related moisture exposure.
Mold removal protects the property in several key ways.
1. Protecting Structural Integrity
Roof decking and attic framing are often made of untreated wood. When moisture lingers, wood can weaken over time.
Mold removal eliminates contamination while structural drying restores stability.
If ignored, prolonged dampness may lead to wood rot and costly framing repairs.
2. Protecting Indoor Air Quality
Attics are not isolated spaces. HVAC ductwork often runs through them.
If mold develops in the attic, airborne spores can circulate throughout the home.
Professional removal, combined with HEPA air filtration, reduces airborne contamination.
3. Preventing Recurrence
Mold removal includes identifying and correcting moisture sources.
In roof-related cases, this means ensuring flashing, underlayment, and ventilation systems are functioning properly.
Without source correction, mold may return even after cleaning.
The Proper Mold Removal Process After Roof Failure
In Merritt Island homes, mold removal following roof damage follows a structured sequence.
Step 1: Moisture Detection
Professionals use moisture meters and thermal imaging to identify damp areas in attic decking, framing, and ceiling cavities.
Mapping moisture spread is essential before remediation begins.
Companies like Inspections and More FL focus on thorough moisture evaluation because coastal humidity often hides residual dampness.
Step 2: Source Repair
Roof repairs must be completed before remediation continues.
This includes addressing:
- Damaged shingles
- Flashing gaps
- Roof penetrations
- Ventilation issues
Drying cannot succeed if the roof remains vulnerable.
Step 3: Containment
Affected areas are isolated to prevent spore spread during removal.
Negative air pressure systems may be used in severe cases.
Step 4: Removal of Contaminated Materials
Saturated insulation and heavily contaminated drywall may need removal.
Porous materials cannot always be salvaged once mold is established.
Step 5: Professional Cleaning
Structural framing and roof decking are cleaned using appropriate remediation techniques.
Surface treatment must remove contamination — not simply mask staining.
Step 6: Structural Drying
Industrial dehumidifiers and air movers reduce moisture levels in wood and adjacent materials.
In Merritt Island’s humid climate, drying must be monitored carefully.
Moisture readings confirm when structural materials are stable.
Step 7: Optional Encapsulation
In some attic systems, mold encapsulation may be applied to cleaned, dry framing for added protection against future humidity exposure.
Encapsulation is a protective step — not a substitute for removal.
Common Mistakes After Roof Leaks
Homeowners sometimes:
- Repair the roof but ignore attic moisture
- Paint over ceiling stains
- Leave damp insulation in place
- Delay inspection until odors worsen
- Assume the issue resolved once visible leaks stop
These shortcuts allow hidden contamination to continue spreading.
Cost Factors for Mold Removal After Roof Failure
Costs depend on:
- Size of affected attic area
- Extent of moisture spread
- Amount of insulation removal
- Duration of drying
- Whether ceiling cavities are involved
Early detection significantly reduces overall cost.
The longer moisture remains, the larger the affected area becomes.
Long-Term Protection Strategies
After mold removal, prevention becomes the focus.
Homeowners in Merritt Island should:
- Schedule annual roof inspections
- Maintain flashing and sealants
- Inspect attics after major storms
- Monitor indoor humidity (45–55%)
- Maintain proper attic ventilation
- Replace aging roofing materials proactively
Routine maintenance protects against future roof-related moisture issues.
Why Local Experience Matters
Merritt Island’s coastal environment presents unique roofing challenges:
- Salt air corrosion
- Frequent tropical systems
- High humidity
- Elevated water tables
- Barrier island wind exposure
Professionals familiar with these conditions understand how moisture behaves in coastal attic systems.
That local knowledge ensures mold removal strategies address both contamination and environmental pressure.
A Practical Approach to Protection
Roof failures in Merritt Island can escalate quickly if moisture remains hidden inside attic systems.
The proper response always follows a clear order:
Repair the roof.
Identify hidden moisture.
Remove contaminated materials.
Dry thoroughly.
Restore and protect.
When mold removal is handled methodically and promptly, it protects structural components, improves indoor air quality, and prevents long-term deterioration.
In Florida’s coastal climate, addressing roof-related moisture fully — not partially — is the key to keeping your Merritt Island property safe, stable, and resilient for years to come.