Moisture Detection in Merritt Island During Extreme Humidity: A Step-by-Step Explanation
Extreme humidity is part of life on Merritt Island. With the Indian River Lagoon on one side, the Banana River on the other, and the Atlantic nearby, moisture in the air can feel constant—especially during summer, storm season, and those stretches when the dew point stays high day and night. In that kind of weather, many homeowners notice the same things: the house feels sticky, windows fog more often, closets smell musty, and certain rooms never seem to “dry out.”
The tricky part is separating normal Florida humidity from a real moisture problem inside the structure.
Moisture detection during extreme humidity is not about panic or worst-case scenarios. It’s a practical process of measurement and pattern recognition. Professionals look for the difference between moisture that’s simply in the air and moisture that’s being stored in building materials—behind walls, inside attic insulation, under flooring, or around HVAC systems.
Below is a step-by-step explanation of how professionals approach moisture detection in Merritt Island during extreme humidity, why each step matters, and what homeowners can expect along the way.
Why Moisture Detection Is Harder During Extreme Humidity
When the weather is very humid, almost everything reads “a little damp” if you rely on touch or appearance. That’s why professionals don’t guess. They use instruments and compare readings to baseline conditions.
Extreme humidity complicates detection because:
-
Outdoor air is already moisture-heavy, so opening windows can make things worse
-
Condensation is more likely, even without leaks
-
Materials absorb moisture from the air, not just from water intrusion
-
AC systems may short-cycle, cooling the air but not removing enough moisture
-
Attics and crawl spaces can act like humidity reservoirs that re-wet the home
In Merritt Island, the goal is to determine whether your home has:
-
high indoor humidity only, or
-
high indoor humidity plus hidden structural moisture.
The second situation is where problems grow over time.
Step 1: Start With Symptoms and Timing (The “Clue List”)
Professionals begin by asking practical questions and observing patterns. During extreme humidity, timing matters.
They’ll typically want to know:
-
When the damp feeling is worst (morning, evening, after rain, after AC cycles off)
-
Whether odors show up after storms or continuously
-
Which rooms feel damp (coastal-facing walls, bathrooms, closets, guest rooms)
-
Whether windows sweat, vents sweat, or floors feel “cool and clammy”
-
If there have been recent roof repairs, plumbing changes, or HVAC issues
-
Whether the home was vacant with the AC off (a common trigger in Florida)
Why this matters: moisture issues often follow predictable patterns. If the damp feeling spikes after rain, it may point to wind-driven intrusion. If it’s worst at night, it may be condensation related. If only one room has the problem, it may be localized moisture behind a wall.
Step 2: Measure Indoor Humidity, Temperature, and Dew Point
Before scanning walls, professionals measure the indoor environment using hygrometers.
Key readings include:
-
Relative humidity (RH)
-
Temperature
-
Dew point
Dew point is especially important during extreme humidity because it indicates how close indoor conditions are to condensation forming on surfaces. When dew point is high, even cool surfaces (like AC vents, ducts, or tile floors) may sweat.
Typical homeowner comfort targets in Florida often aim for 45–55% RH indoors, but during extreme humidity events, readings may climb higher. The question becomes: is your HVAC controlling it properly, and is the structure contributing moisture back into the air?
Why this matters: if RH is high but materials are dry, the solution may focus on HVAC performance and dehumidification. If RH is high and materials are wet, further investigation is needed.
Step 3: Establish Baseline Moisture Readings in “Dry” Areas
Moisture meters are sensitive. In Florida, baseline readings are higher than in arid climates. Professionals avoid false alarms by establishing baselines.
They will take readings in areas that appear unaffected, such as:
-
Interior walls away from plumbing
-
Higher sections of walls above baseboards
-
Rooms that don’t show damp symptoms
-
Dry framing in accessible spaces (where possible)
This creates a reference point. From there, they compare suspect zones to baseline.
Why this matters: without baseline readings, extreme humidity can make everything seem abnormal. Baselines help confirm what’s truly elevated.
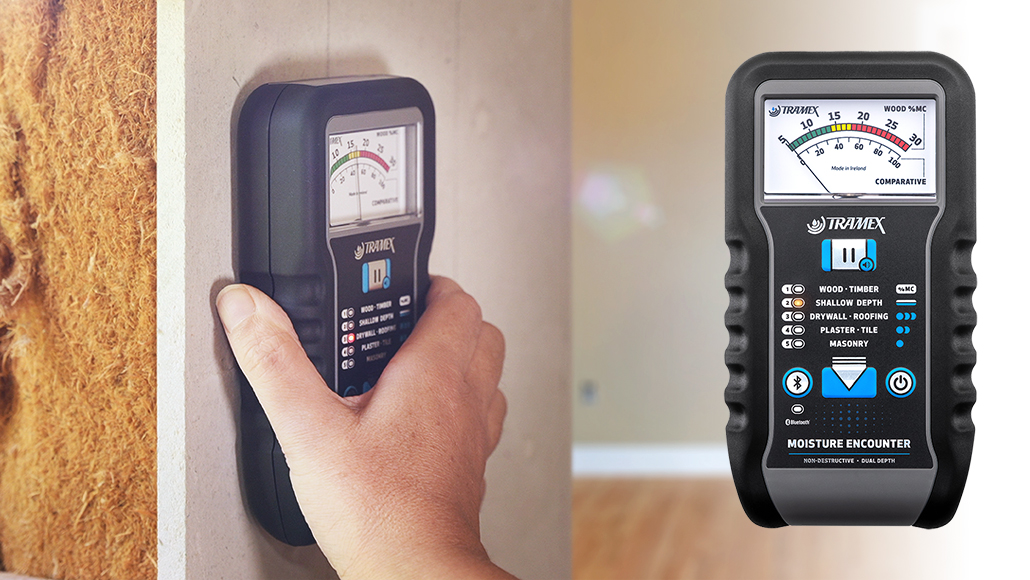
Step 4: Moisture Mapping With Professional Meters (Pin + Pinless)
Once baselines are set, professionals perform moisture mapping—testing multiple points to create a “moisture picture” of the home.
Pinless Moisture Meter Scanning
Pinless meters scan larger areas quickly and help identify zones with elevated moisture behind surfaces.
They are useful for:
-
Drywall sections
-
Ceiling areas under attic zones
-
Flooring edges
-
Cabinet sides
-
Large wall spans
Pin-Type Moisture Meter Confirmation
Pin meters take more precise readings in:
-
Wood trim and baseboards
-
Framing (where accessible)
-
Suspect drywall zones
-
Door frames
-
Window framing
Why both matter: pinless scanning finds patterns; pin meters confirm depth and severity.
In Merritt Island homes during extreme humidity, professionals pay special attention to:
-
exterior-facing walls
-
baseboards and lower drywall areas
-
closets on exterior walls
-
areas near sliding glass doors
-
rooms with older windows or aging caulk lines.
Step 5: Thermal Imaging to Identify Hidden Patterns
Thermal imaging is one of the most useful tools during humidity-driven investigations—especially when moisture is hidden.
Thermal cameras detect surface temperature differences. Moisture often creates cooler areas due to evaporation effects and heat transfer changes.
Thermal imaging can help identify:
-
damp insulation behind drywall
-
moisture trails from roof or window intrusion
-
condensation patterns around ducts
-
slab-edge moisture zones
-
hidden plumbing leaks following pipe paths
Important: thermal imaging doesn’t “see water.” It shows anomalies. Professionals always confirm thermal findings with moisture meters.
Why this matters: in extreme humidity, moisture is often widespread but not obvious. Thermal imaging narrows down where to test more deeply.
Step 6: Focus Checks for Merritt Island’s Most Common “Humidity Traps”
During extreme humidity, certain areas repeatedly cause trouble in Merritt Island homes.
Attic Spaces
Attics can become humidity reservoirs. Professionals check for:
-
damp insulation
-
roof decking moisture
-
nail sweating
-
poor ventilation
-
insulation blocking soffit vents
A damp attic can reintroduce humidity into living areas through penetrations and attic access points.
HVAC and Ductwork
Cold ducts in a hot humid attic can sweat if insulation is compromised.
Professionals look for:
-
wet duct insulation
-
condensation at supply boots
-
damp return air cavities
-
clogged condensate drains
-
overflow pan history
HVAC systems may cool the home while still leaving humidity high—especially if they short-cycle.
Bathrooms and Laundry Areas
Exhaust fan use, dryer venting issues, and minor plumbing leaks can create localized humidity pockets.
Slab Edges and Flooring Transitions
Even without flooding, moisture can migrate upward through slabs when soil is saturated. Professionals test slab-adjacent walls and baseboards.
Why this matters: these zones often hold the “real” moisture source, even when the living room feels like the problem.
Step 7: Decide If the Issue Is Condensation, Intrusion, or Both
After mapping and imaging, professionals interpret the pattern.
Common outcomes include:
Condensation-Driven Moisture
Signs include:
-
moisture at vents, duct boots, and cool surfaces
-
widespread light dampness rather than a single leak path
-
high RH and high dew point indoors
-
minimal localized staining but recurring window sweating
The solution focuses on humidity control, HVAC tuning, insulation integrity, and ventilation improvements.
Intrusion-Driven Moisture (Rain, Roof, Windows)
Signs include:
-
moisture patterns that follow roof lines, window frames, or siding seams
-
higher readings in localized wall sections
-
staining or soft drywall in specific zones
-
thermal “trails” consistent with water travel
The solution focuses on source correction plus targeted drying.
Mixed Conditions
This is common in Merritt Island. A small roof or window leak adds moisture, and extreme humidity prevents it from drying, creating a combined problem.
Why this matters: the solution must match the cause. Treating condensation like a leak (or vice versa) leads to recurring issues.
Step 8: Targeted Inspection Openings (Only When Needed)
When readings strongly suggest moisture inside a wall cavity or ceiling space, professionals may recommend small, targeted access openings rather than widespread demolition.
This helps confirm:
-
insulation saturation
-
framing moisture content
-
presence of microbial growth
-
hidden staining
In Florida, wet insulation is a major moisture reservoir. If it stays in place, humidity can keep rebounding.
Why this matters: targeted access reduces unnecessary repairs while confirming what’s truly happening.
Step 9: Develop a Moisture Control Plan Based on Findings
Moisture detection should lead to practical next steps, not vague warnings.
Depending on what’s found, a plan may include:
-
dehumidification (temporary or ongoing)
-
structural drying in specific zones
-
attic ventilation improvements
-
duct insulation repair or sealing
-
HVAC adjustments to reduce short cycling
-
sealing windows/doors and correcting intrusion points
-
post-storm inspection routines
A company like Inspections and More FL typically keeps recommendations homeowner-first: fix the source, dry the materials, and prevent recurrence—without pushing unnecessary work.
Step 10: Verification and Follow-Up (The Step Homeowners Appreciate Most)
In extreme humidity, moisture problems tend to return if they weren’t fully resolved.
Professionals often verify results by:
-
re-checking moisture readings after corrective work
-
confirming indoor RH stability over multiple days
-
rescanning key zones with thermal imaging
-
ensuring musty odors are not returning after rain or at night
Why this matters: Florida conditions can mask incomplete fixes. Verification prevents repeat surprises.
Practical Homeowner Tips While You’re Waiting for an Inspection
If your home feels damp during extreme humidity, a few calm steps can help while you schedule evaluation:
-
Keep windows closed during peak humidity periods
-
Run HVAC consistently (avoid turning it off for long periods)
-
Use bathroom exhaust fans during showers and for at least 15–20 minutes after
-
Check and replace HVAC filters regularly
-
Look for early signs around baseboards, closets, and window frames
-
If you have a humidity monitor, track RH and note when it spikes
-
Check for condensate drain issues if you see water near the air handler
These aren’t replacements for professional detection—but they reduce the chance of moisture getting worse.
A Clear Takeaway for Merritt Island Homeowners
Moisture detection during extreme humidity in Merritt Island is about separating normal Florida dampness from hidden structural moisture that can lead to mold and long-term damage.
Professionals approach it step-by-step:
-
document symptoms and timing
-
measure RH, temperature, and dew point
-
establish baseline readings
-
map moisture with meters
-
use thermal imaging to spot hidden patterns
-
inspect common humidity traps (attics, HVAC, slab edges)
-
identify whether it’s condensation, intrusion, or both
-
confirm with targeted openings if needed
-
build a moisture control plan
-
verify results so the issue doesn’t return
In a coastal environment like Merritt Island, this measured approach protects not only comfort, but also the structure of the home—and it helps prevent small humidity issues from becoming expensive repairs later.